In this article, we will:
- Install AllSpice render tool
- Set up a pre-commit hook to generate visible svgs
AllSpice render tool
The first step in this process step is to download and install AllSpice Diff and render tool. We’ll use this to generate a vector image for each schematic file that GitHub can render.
After installing, you should see the following:

We’re not going to use the GUI for this, so you can exit the application.
Setting up a pre-commit Git hook
The next step is setting up a pre-commit Git hook that will call AllSpice to render CLI, generate svgs, and add them to the project repo each time you commit changes to your Altium project.
By default, Git will look for hooks in your `.git/hooks/` directory, which is not committed to the repo. However, I recommend creating a new location for this hook and adding it to the repository so that you can ensure everyone who commits to the project in the future will create an up-to-date rendering for your schematics.
Create a folder in your base repo called `.githooks` and add it to Git with:
git config core.hooksPath .githooks
Note: this configures the Git hook for your local repository. You will need to run this command for each Git repo you want to enable the hook in. Best practice is to add this command to a README file.
Now we can add the pre-commit hook. The file needs to be named `pre-commit`.
The full pre-commit hook and example directory can be found here.
You can download the raw file above, place it into the directory we created, and add it to the Git repo. For example, using:
git add .githooks/pre-commit
However, if you’re interested in understanding what’s going on behind the scenes, I’ll explain how it works below.
Finally, commit the Git hook file to your repository with:
git commit -m “Add git hook to render schematics”
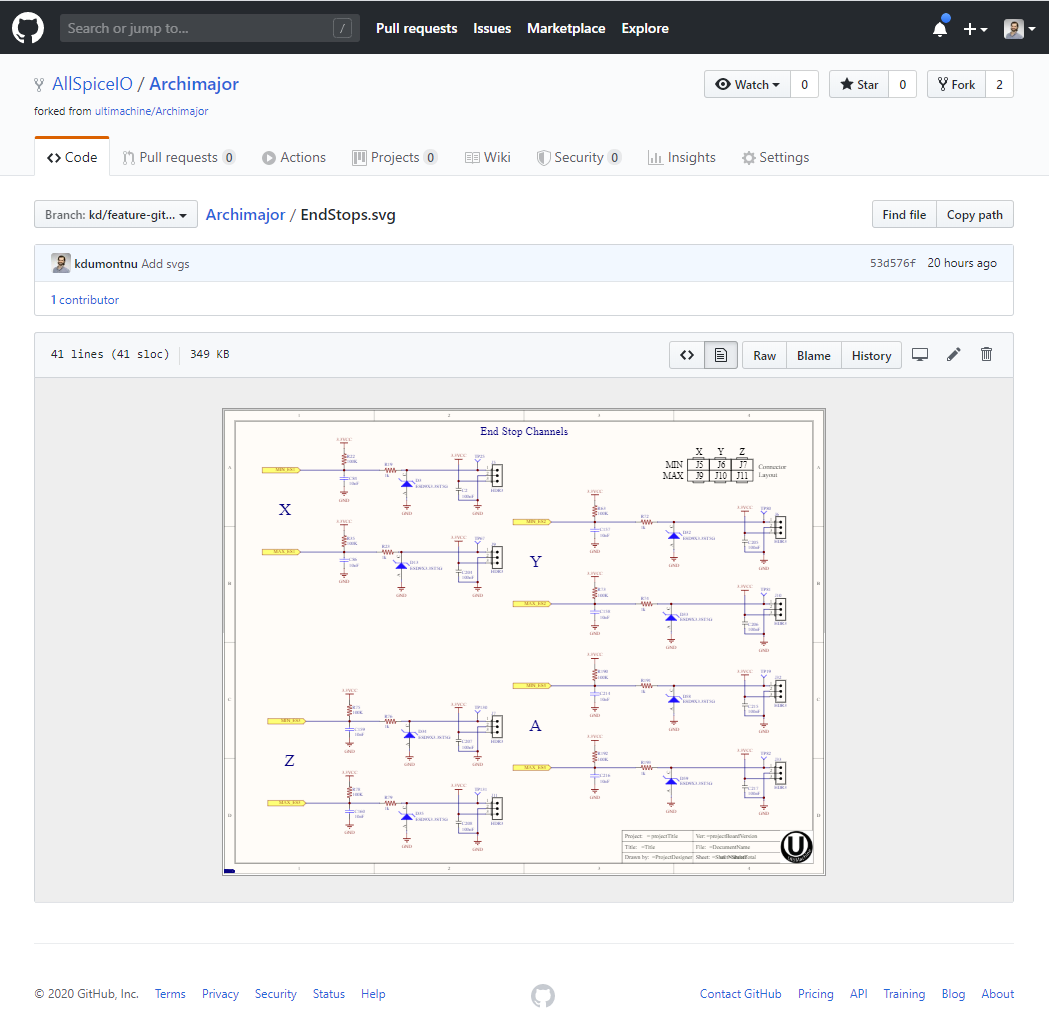
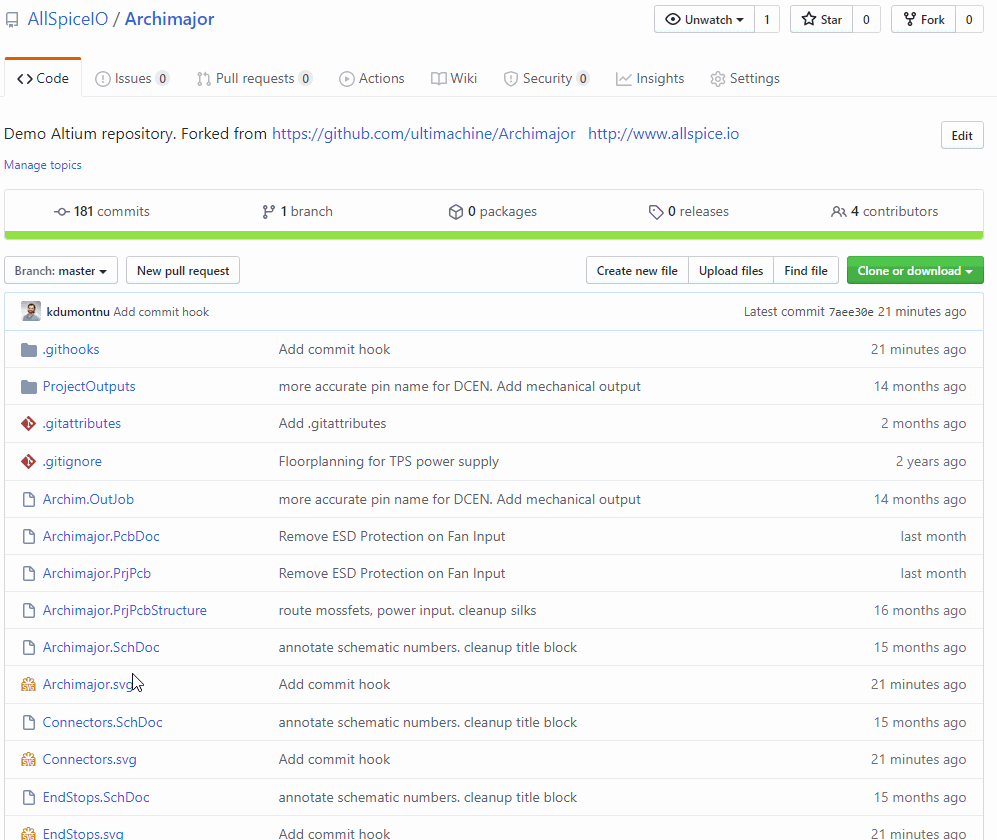
And you should see an svg rendered and added for each schematic in your repository.

The result
After pushing the file to your remote you’ll find a viewable rendering for your product CAD data.
💡 This pairs very well with File Icon for GitHub and GitLab Chrome extension.
What’s next?
Next, we’ll utilize the design renderings to recommend best-practices for conducting a design review or pull request in GitHub.
[Bonus] Understanding the Git hook script
The first half of the githook resolves the install path for the AllSpice render tool.
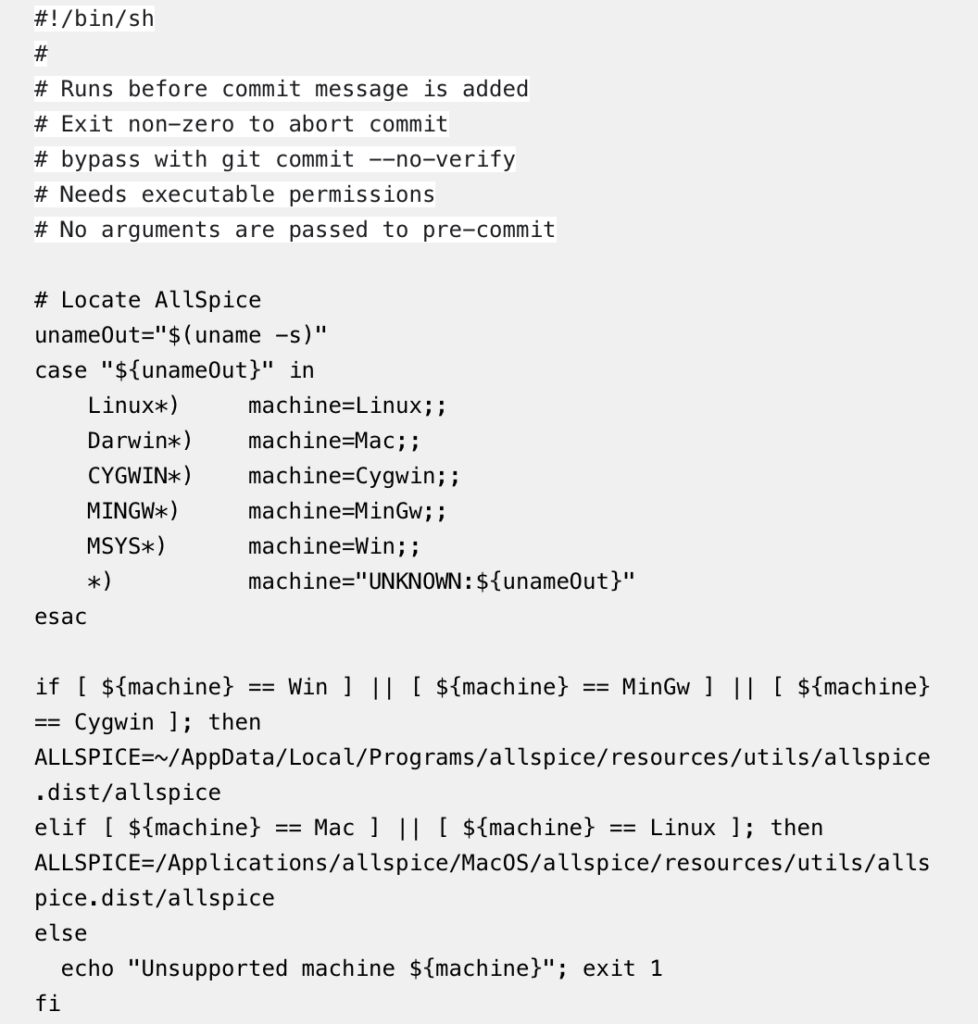
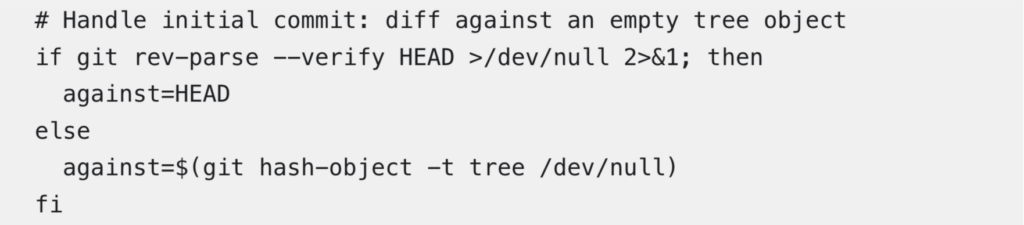
Next, there is a special case for the first commit, which needs to diff against an empty object.
We then build an array for the modified schematics, as well as the entire list of schematics in the repository.

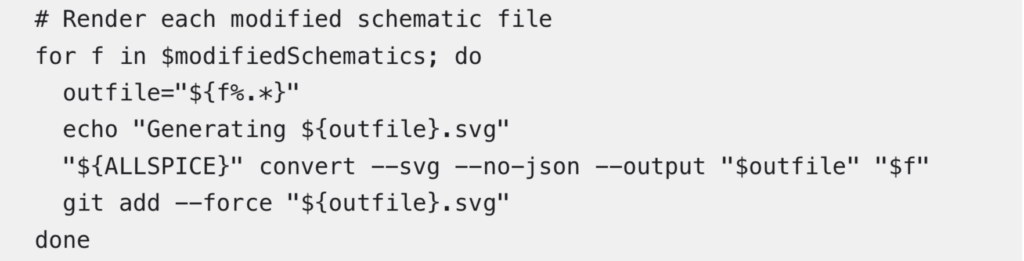
Finally, we traverse the modified array to generate new svgs using the AllSpice CLI and the entire array list to generate an svg for any new schematics.

.png)
